On and off, I’ve considered printing at home for a decade – to be able to print on demand, affordably, flexibly, in a controlled fashion, and befitting my brand, delivering an extremely high standard my customers can count on.
It remained a fantasy as I continued to revisit and ogle images/specs of behemoth printers firmly over £1000.
It’s been well worth the wait, partly owing to the chronic trend of consumer-level electronics becoming more sophisticated, offering more professional-level function as time moves on.
Mainly, though, it’s because I’ve slowly grown to realise and develop an understanding of what the whole process demands, with a great deal of help from the guys at The Studio.
Acquiring images, editing them, proofing, printing and protecting them. Spending over £1000 on a printer when I wasn’t ready would have been a huge waste, for me and for any customer expecting the best.
I’ve been knuckling down, especially over the last few weeks, to get this absolutely right. Here’s the process:
1. Acquiring images
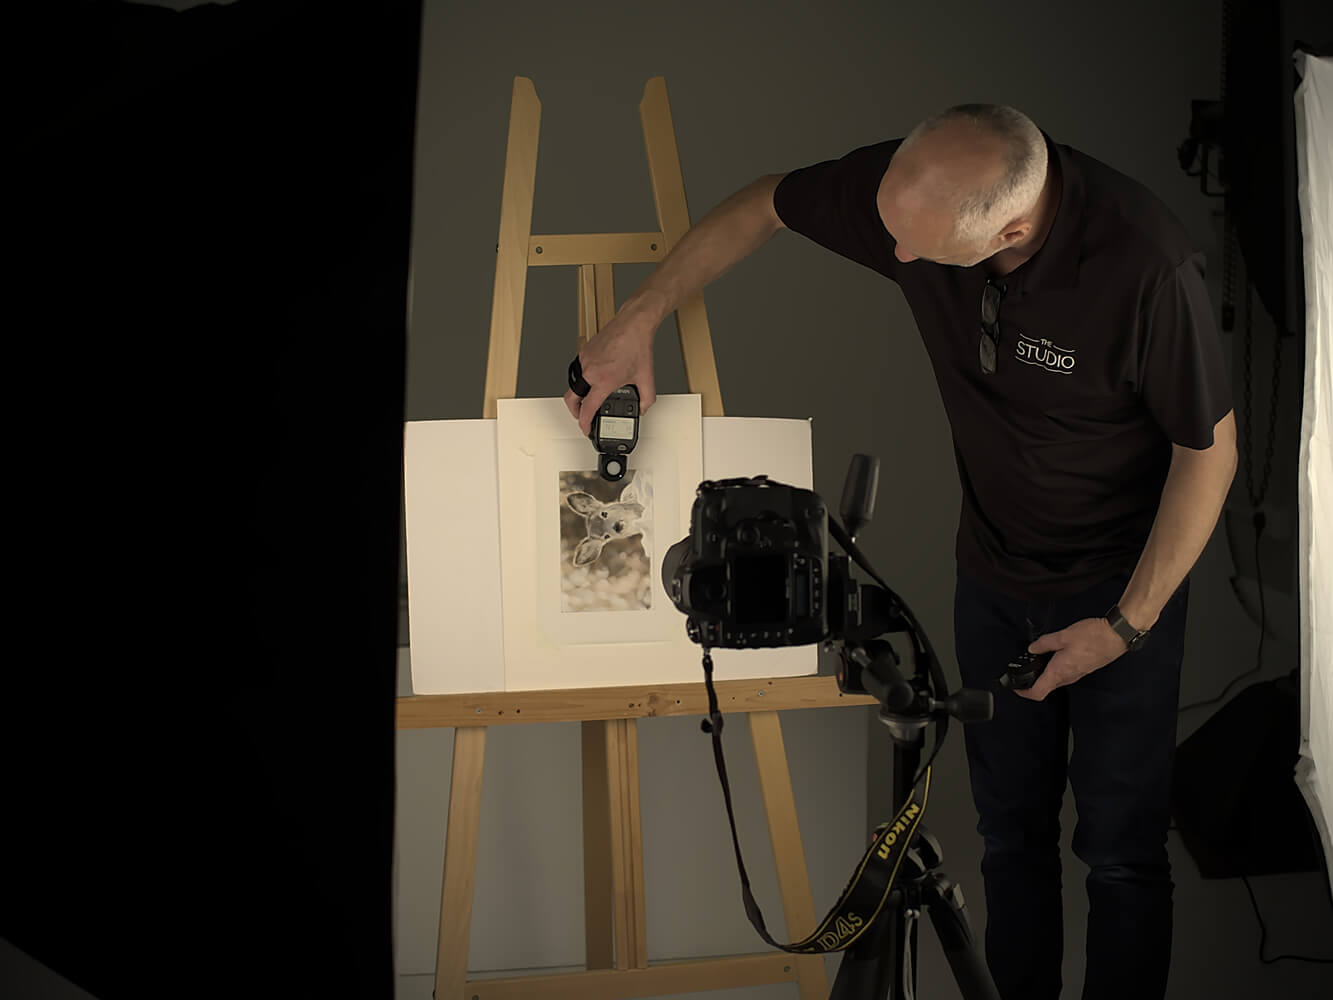
I take my unframed pieces to The Studio. A scanner (and stitching together output images) would be a good option for me if I didn’t produce graphite or uncoated pastel/charcoal works. However, the scanner bulb lights the image more directly than an oblique-angled soft light, creating a graphite sheen, and scanning uncoated works can be messy.
I can’t replicate studio environment conditions at all – the professional-level camera, the light meters, the softboxes – so the idea of using my own photos is completely preposterous. Thankfully, the service from The Studio is impeccable, and I trot away with several 50mB RAW files on a flash drive.
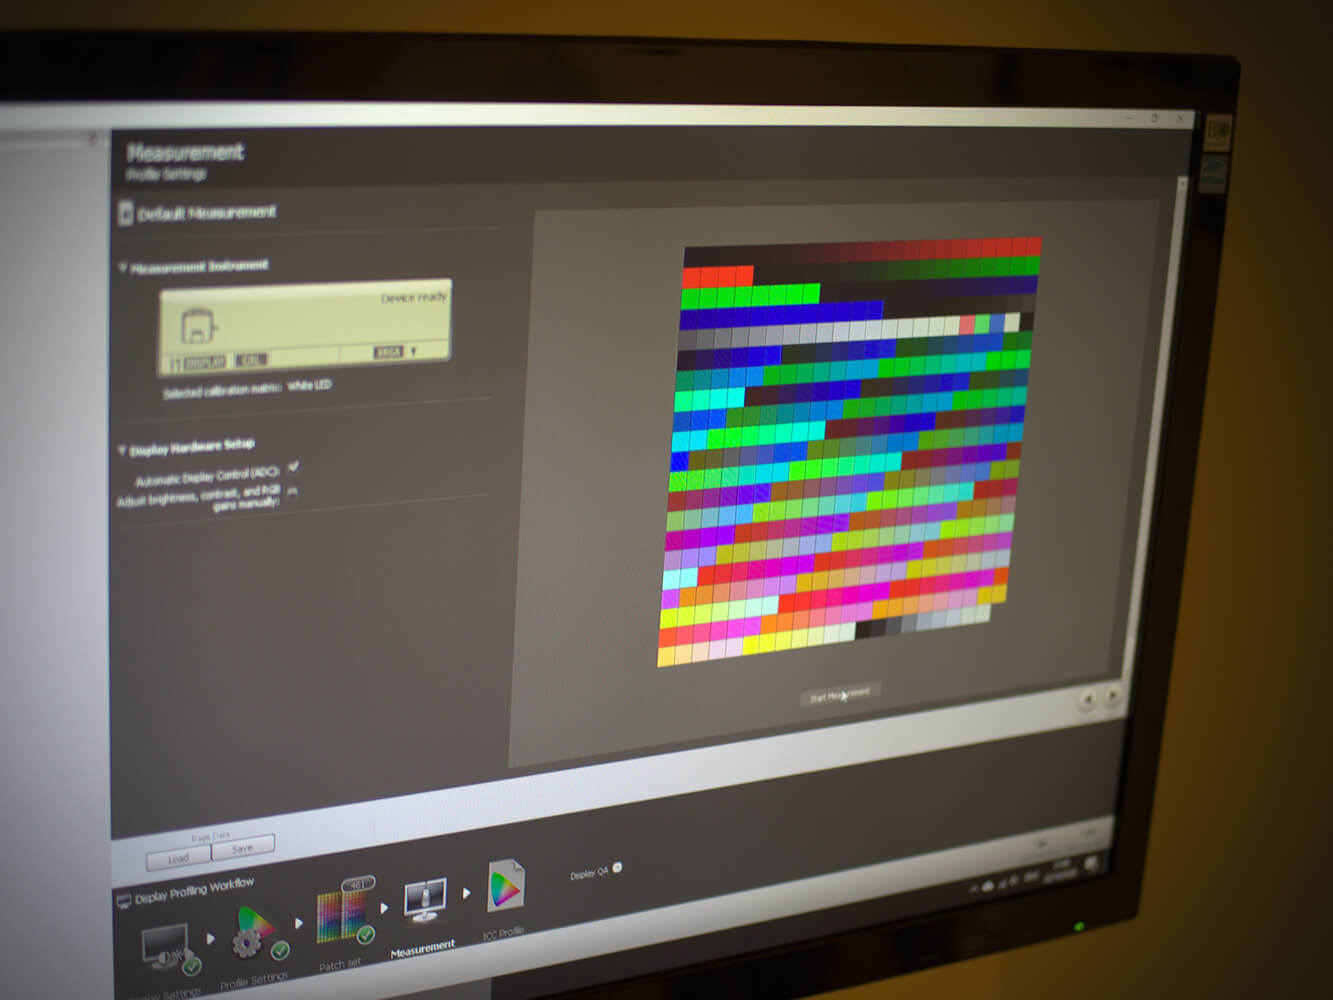
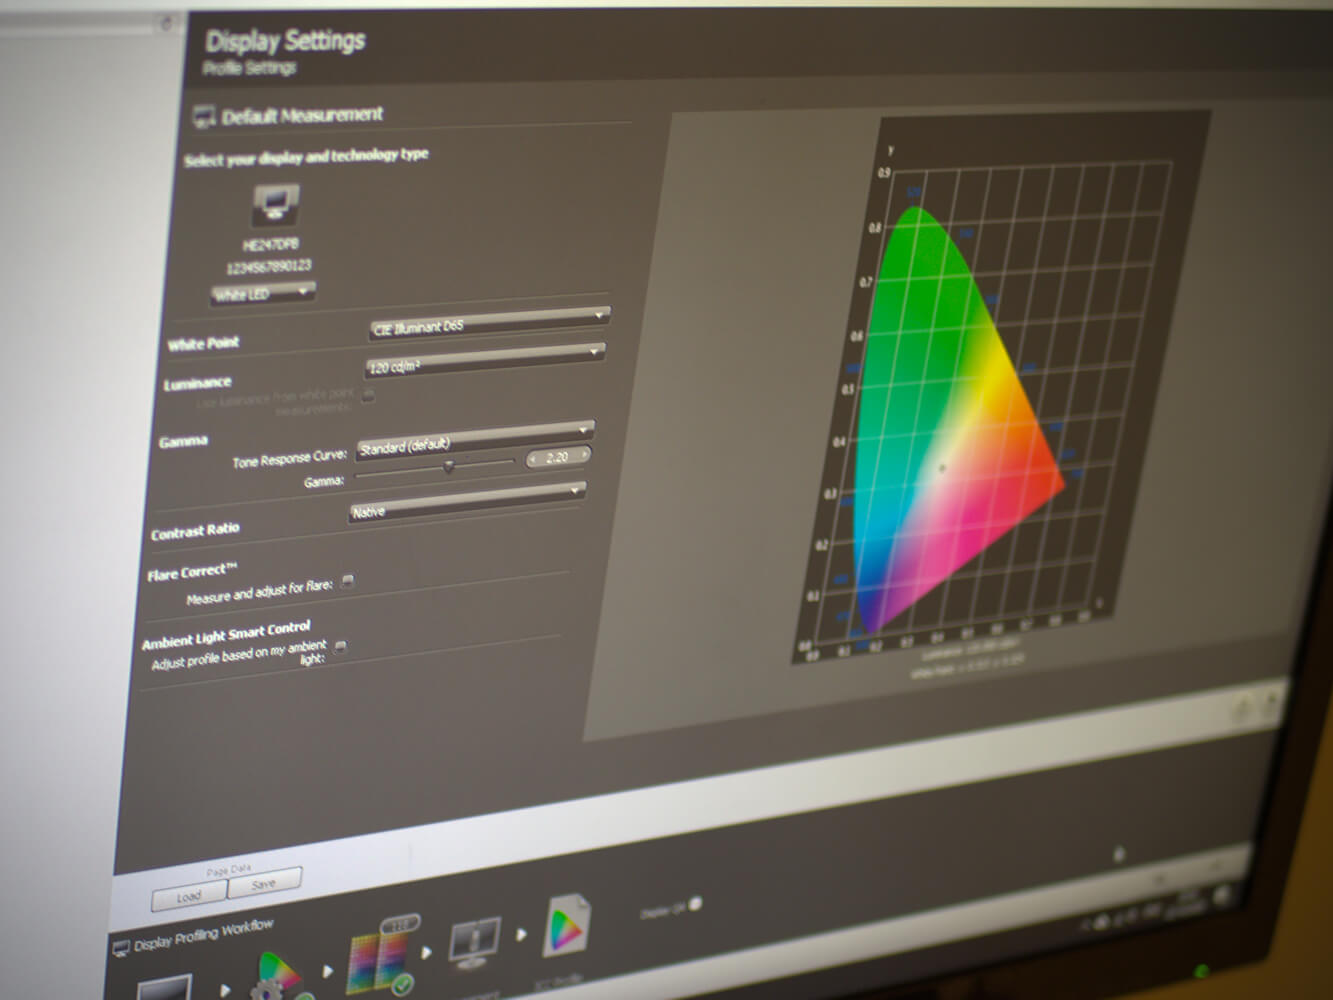
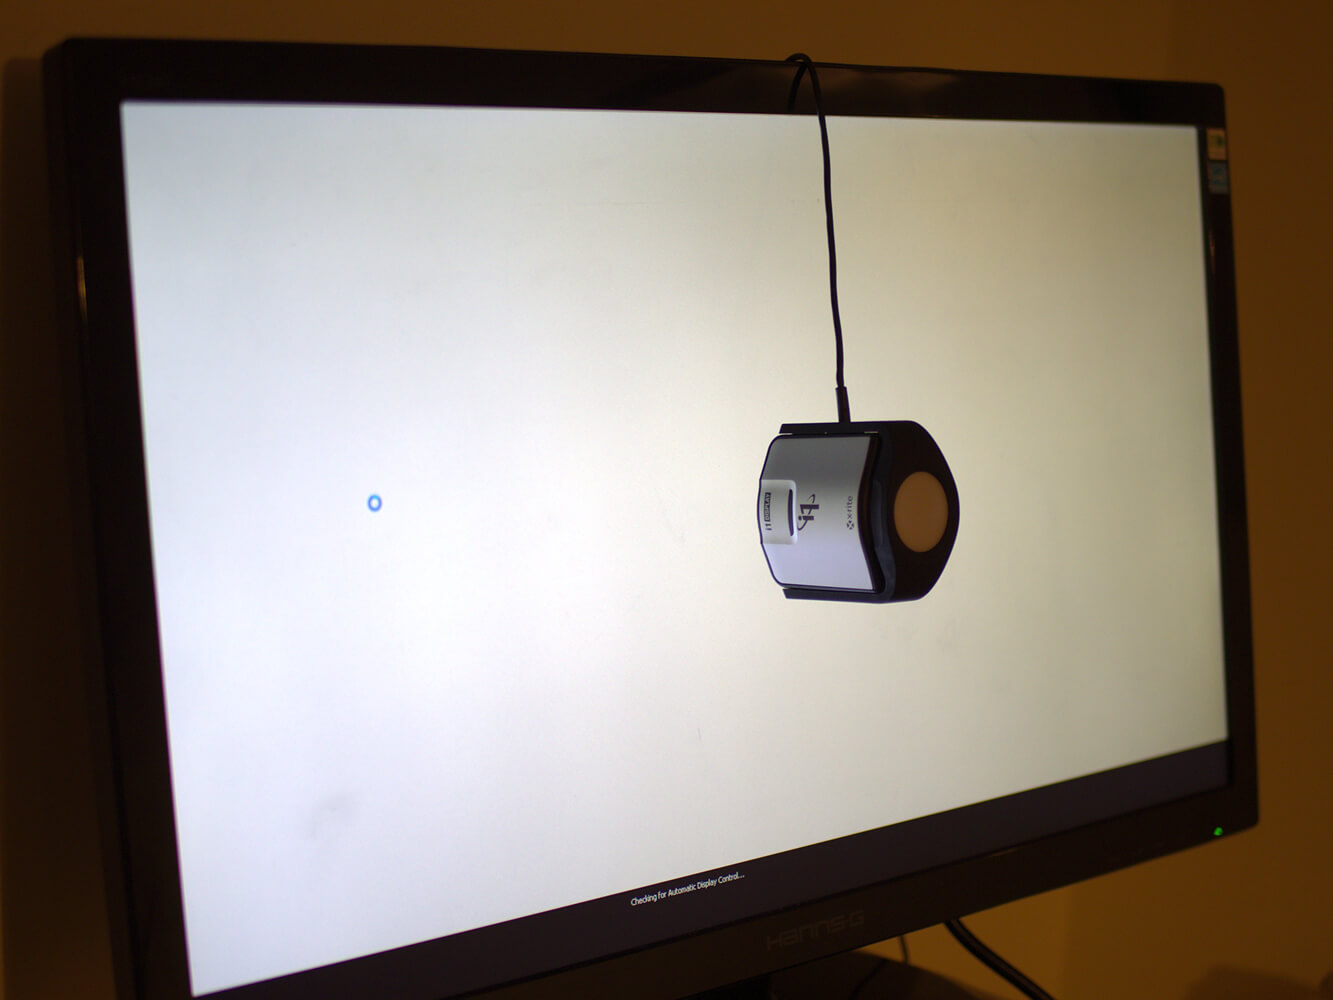
2. Calibration of computer monitor
Whatever editing software used, if I’m unaware that my computer monitor output is slightly too red, for example, I’ll adjust the image to reduce the redness. But the digital image file is what counts, and since my monitor was inaccurate to begin with, the file is now in fact not quite red enough.
Jumping excitedly straight over to the printer I might find, to my dismay, I’ve just wasted good ink and paper on an image that hasn’t replicated the original in an accurate enough manner.
Editing images on a monitor showing inaccurate colour is a meaningless exercise, so properly calibrating it is essential.
The X-Rite i1display profiler measures the light and colour output of my monitor, and ambient light control, offering a new, adjusted monitor profile at the end to account for the above variables.
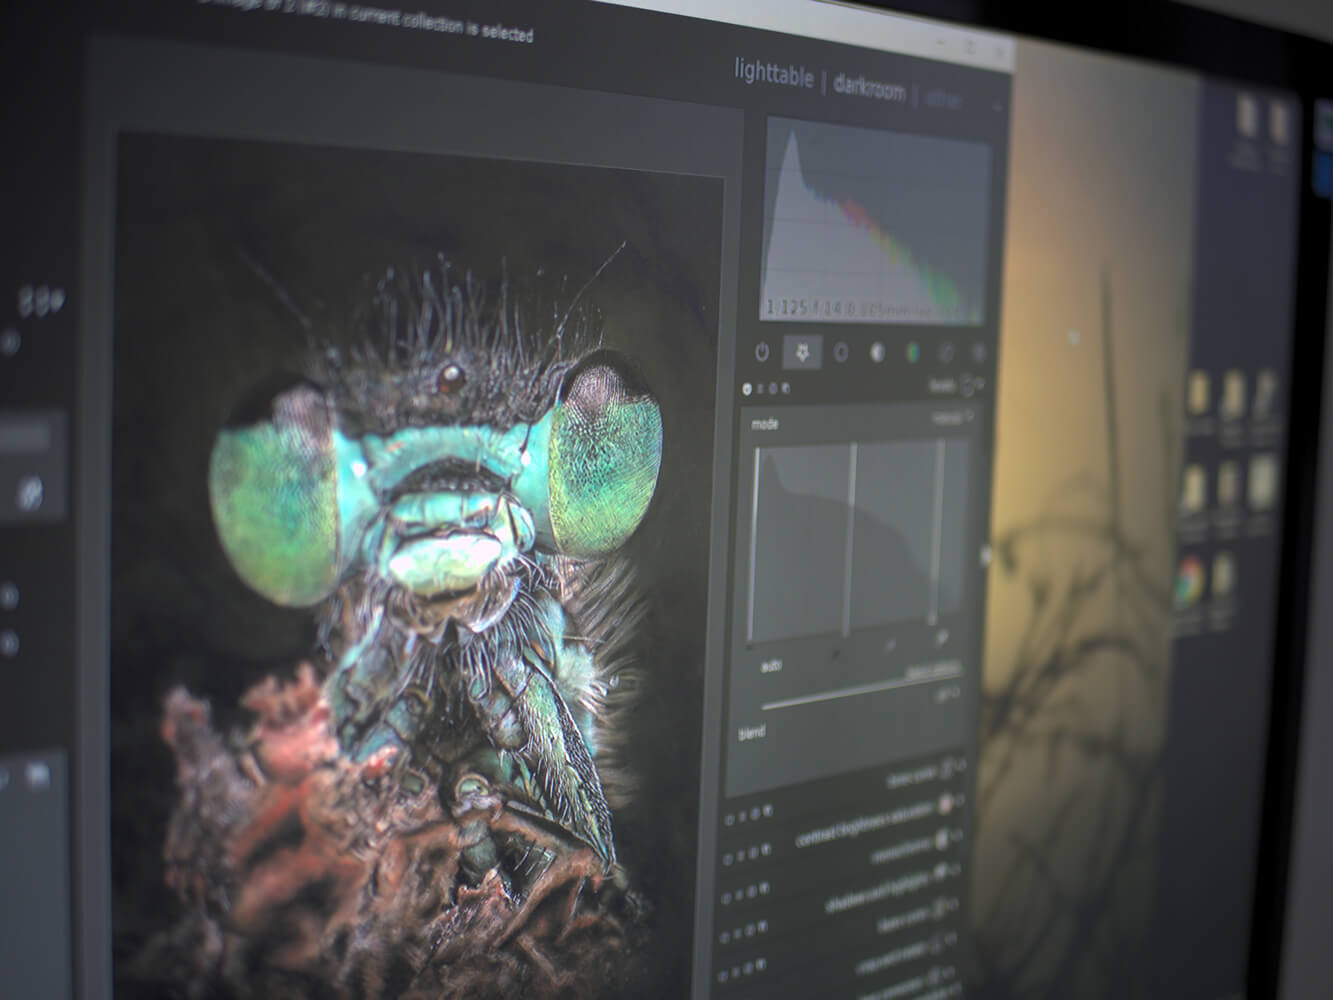
3. Editing software – Darktable
This has been my most recent editing software. It’s free to download, very intuitive, and has lots of advanced functionality.
Other paid-for and subscription-based services are available, but Darktable provides an intuitive environment while also making the jump into methods previously unknown, without leaving me rudderless! Their online manual is very easy to follow.
I ensure the files I adjust are RAW only, untampered with by the camera’s processor and for non-destructive editing, eventually outputting to TIFF, so there’s no loss of clarity if I need to re-edit these for web use etc.
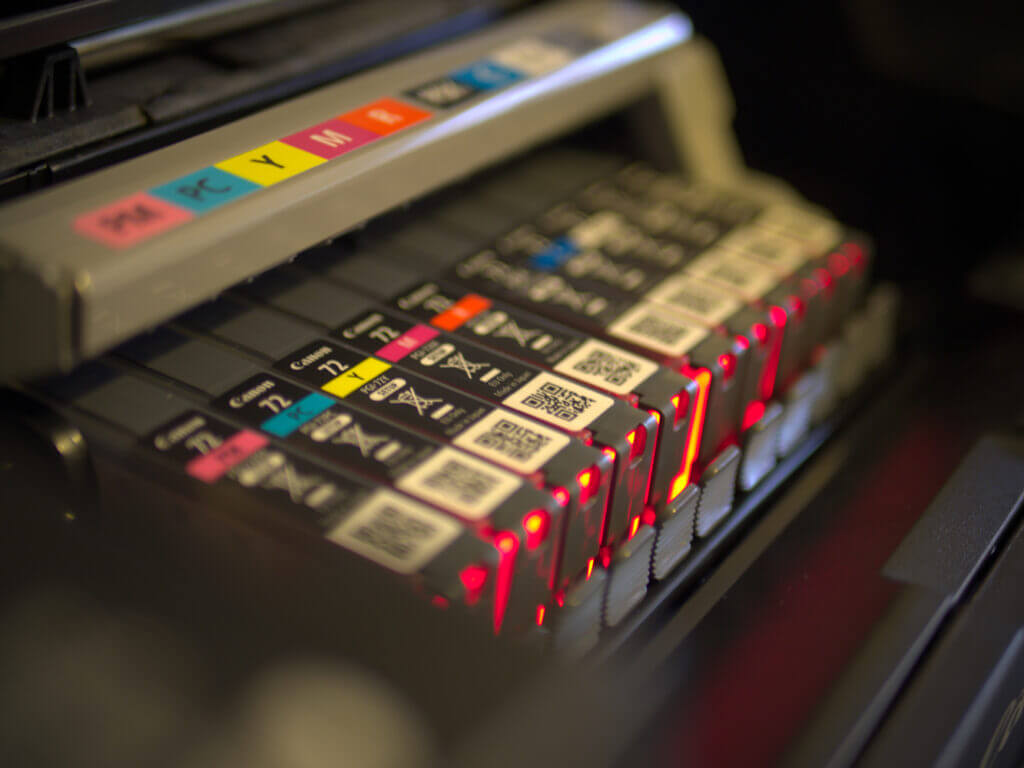
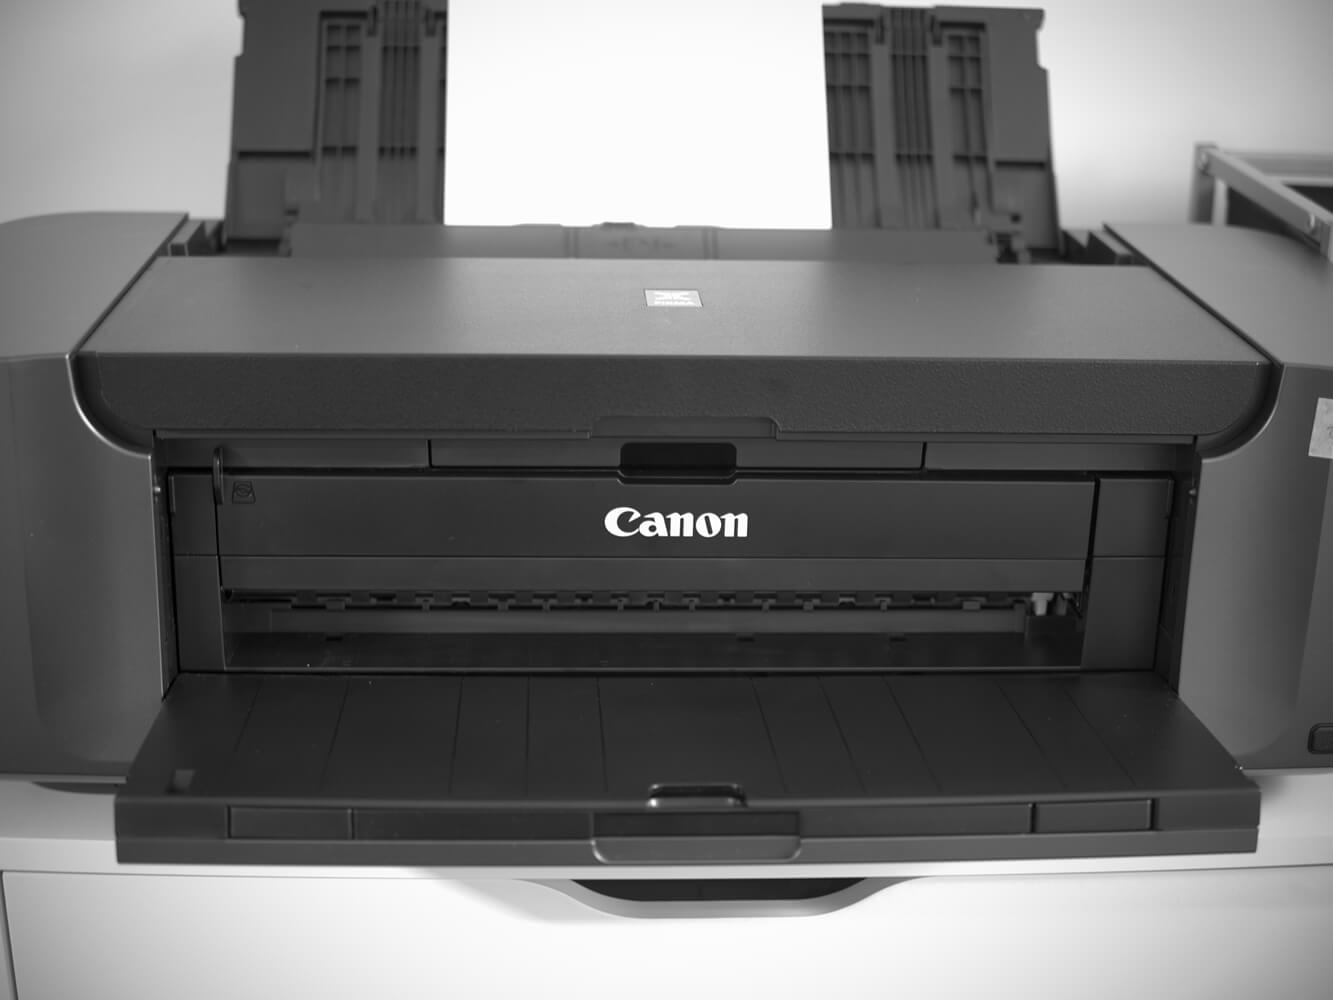
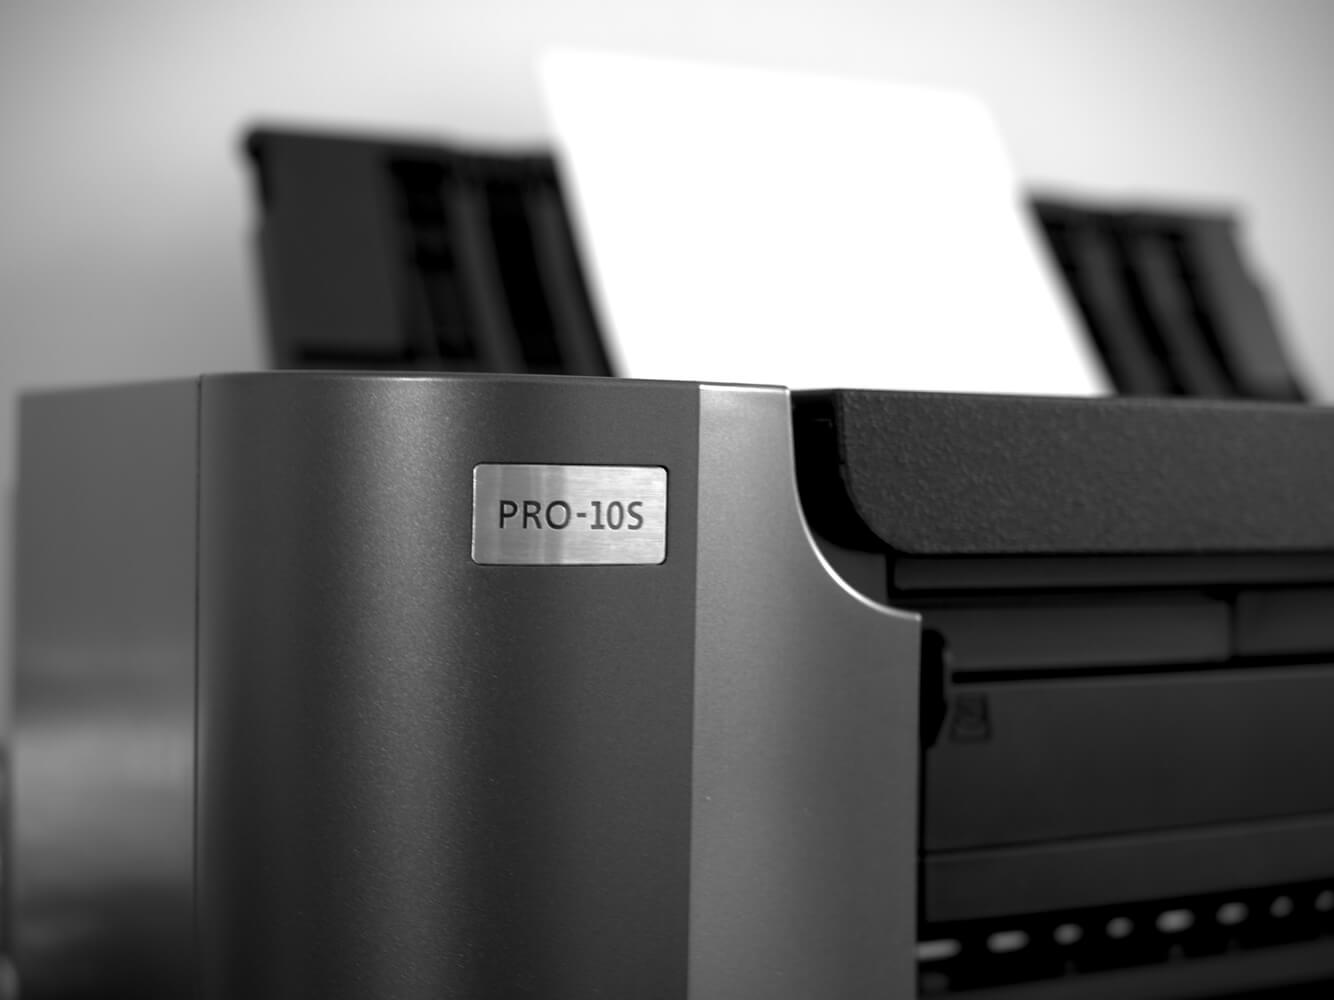
4. The printer
I bought the Canon Pixma Pro 10s (£529, all inks included), after some invaluable advice from Tammy Howarth.
This is a pigment-based inkjet printer, capable of producing archival, professional quality prints on all sorts of paper. The results are fantastic.
I watched hours and hours of instructional videos by José Rodriguez, as I wanted to know as much about this printer as possible before even opening it. His channel proved to be a valuable resource.
I use OEM ink (Original Equipment Manufacturer – so obviously, in this case, Canon). Canon inks are expensive. The next best thing is a fraction of the price, but to guarantee the longevity of both a printer of this quality and the prints themselves, any alternatives to OEM are decidedly out of the question.
Artists, NB: if you buy a Canon printer, print something every couple of days, keep the power on (the power draw is nominal), and disable the auto-off setting in the driver. If you fail to do these things, cleaning cycles will occur in spite of you. While they’re necessary on occasion, they eat up your precious ink, so don’t invite your printer to perform too many of them.
If I could print using just the printer driver and software, that’s the simple life I always aim for. Sadly, the provided canon utilities are very basic, so I needed to give that some thought…
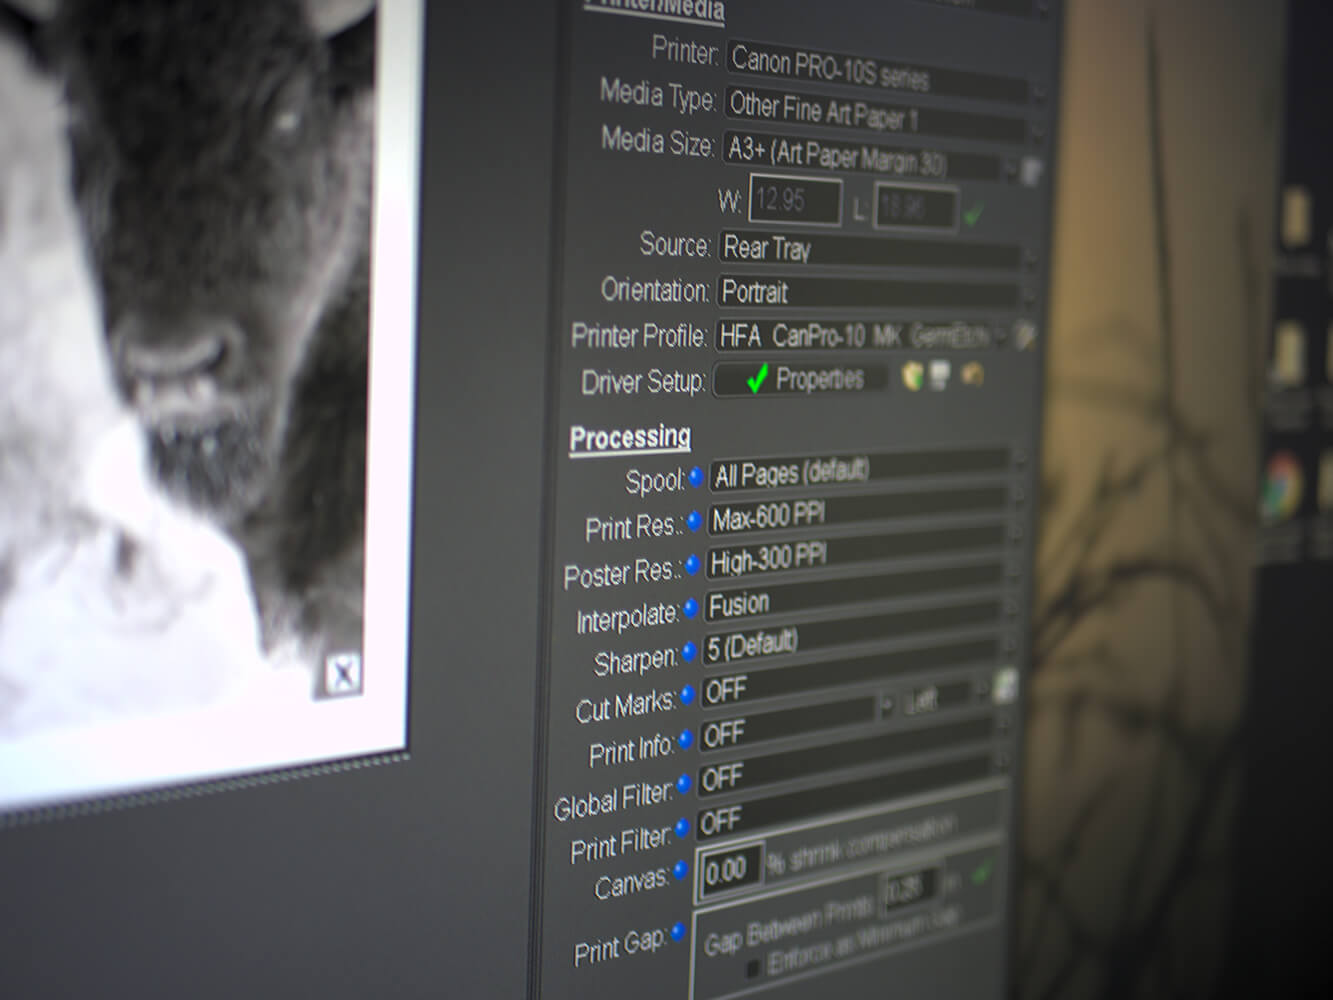
5. Printing software – Qimage Ultimate
After plenty internet searches and advice, I chose Qimage Ultimate. It’s a breeze to work with, and well worth the money if you want hassle-free printing. The developers constantly listen to the community using it, and change the software accordingly and regularly, which is why it’s the optimal environment for most leading printers.
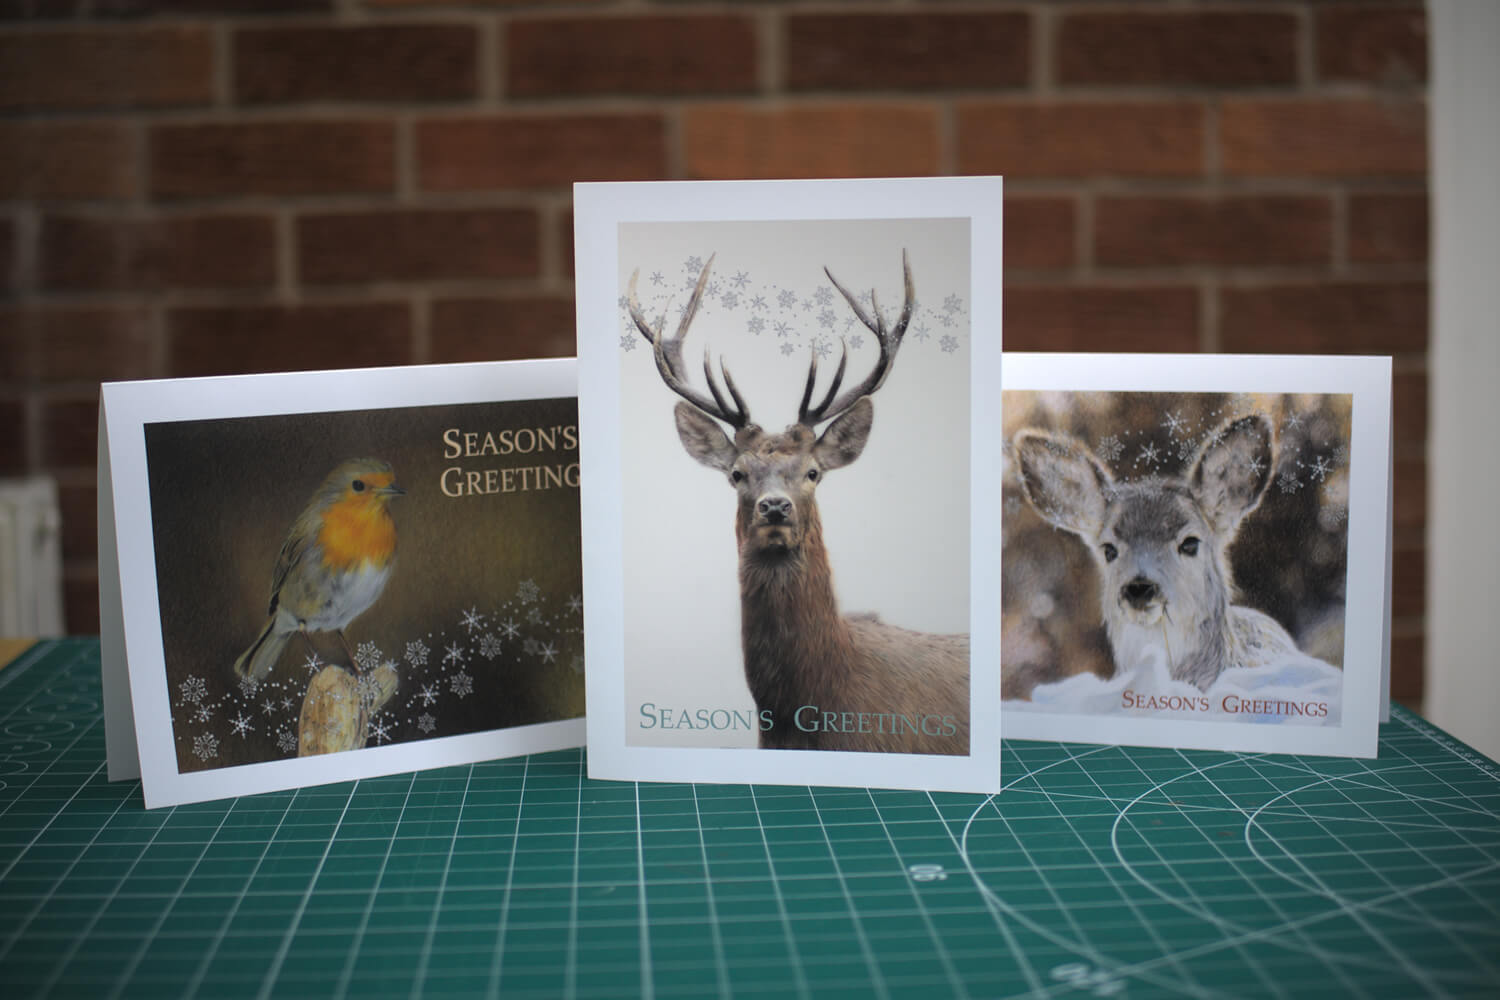
Everything you ever need is here. Colour management with ICC profiles for your specific paper, scheduled purge sheets (to automatically avoid the need for more wasteful, timed cleaning cycles), soft proofing, and simple and accurate image placement control. On that front, what you see is what you get, and it’s worth its weight in gold when printing greetings/business cards.
The Ultimate version also includes a very decent photo editor, so I may well end up moving over to this from Darktable, if it means simplifying and aligning the workflow.
Prints will never fully replicate the colour gamut and contrast of a backlit display, but this software gets me as close as possible to the real thing.
I found the one-off licence fee of £55 far more attractive than having to pay a monthly subscription for Adobe Lightroom with a Canon printer driver plugin.
I won’t compare the two products, as I can’t. I’m just over the moon with Qimage, what more can I say?
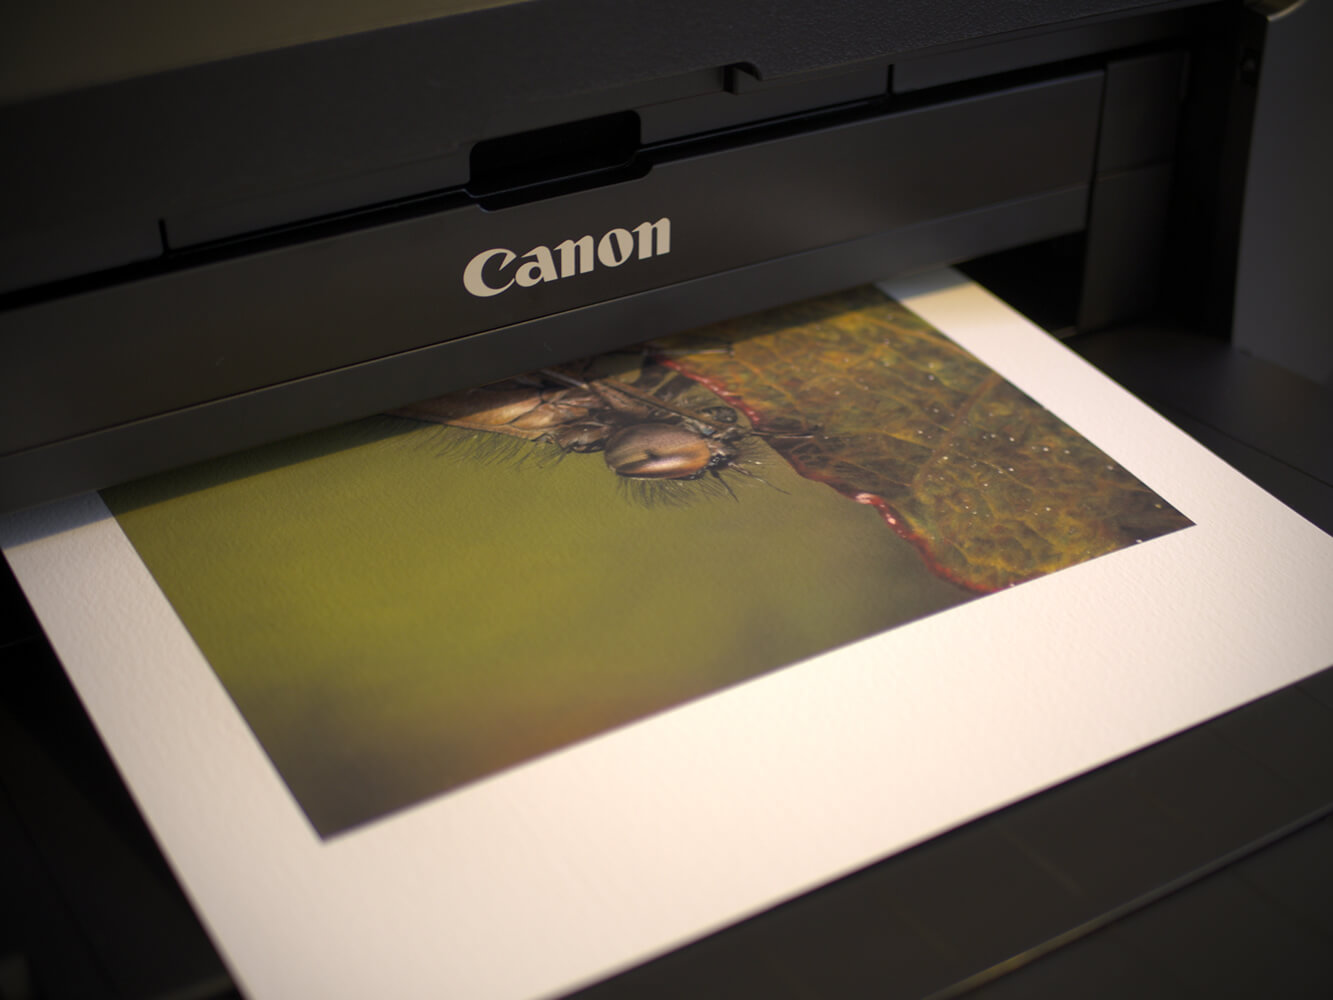
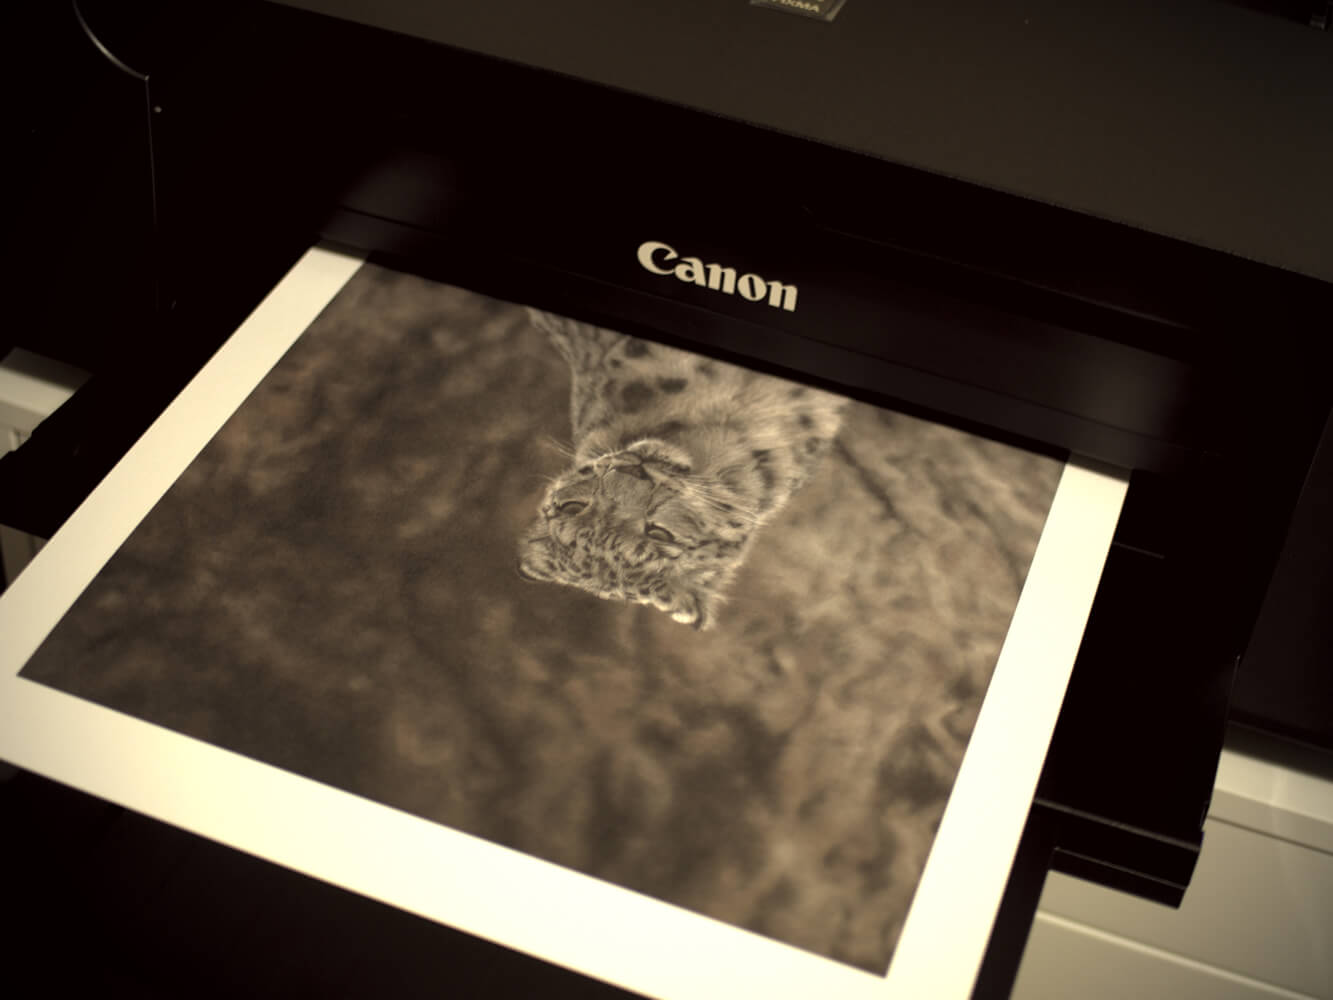
6. Nothing else to do for now but…print!
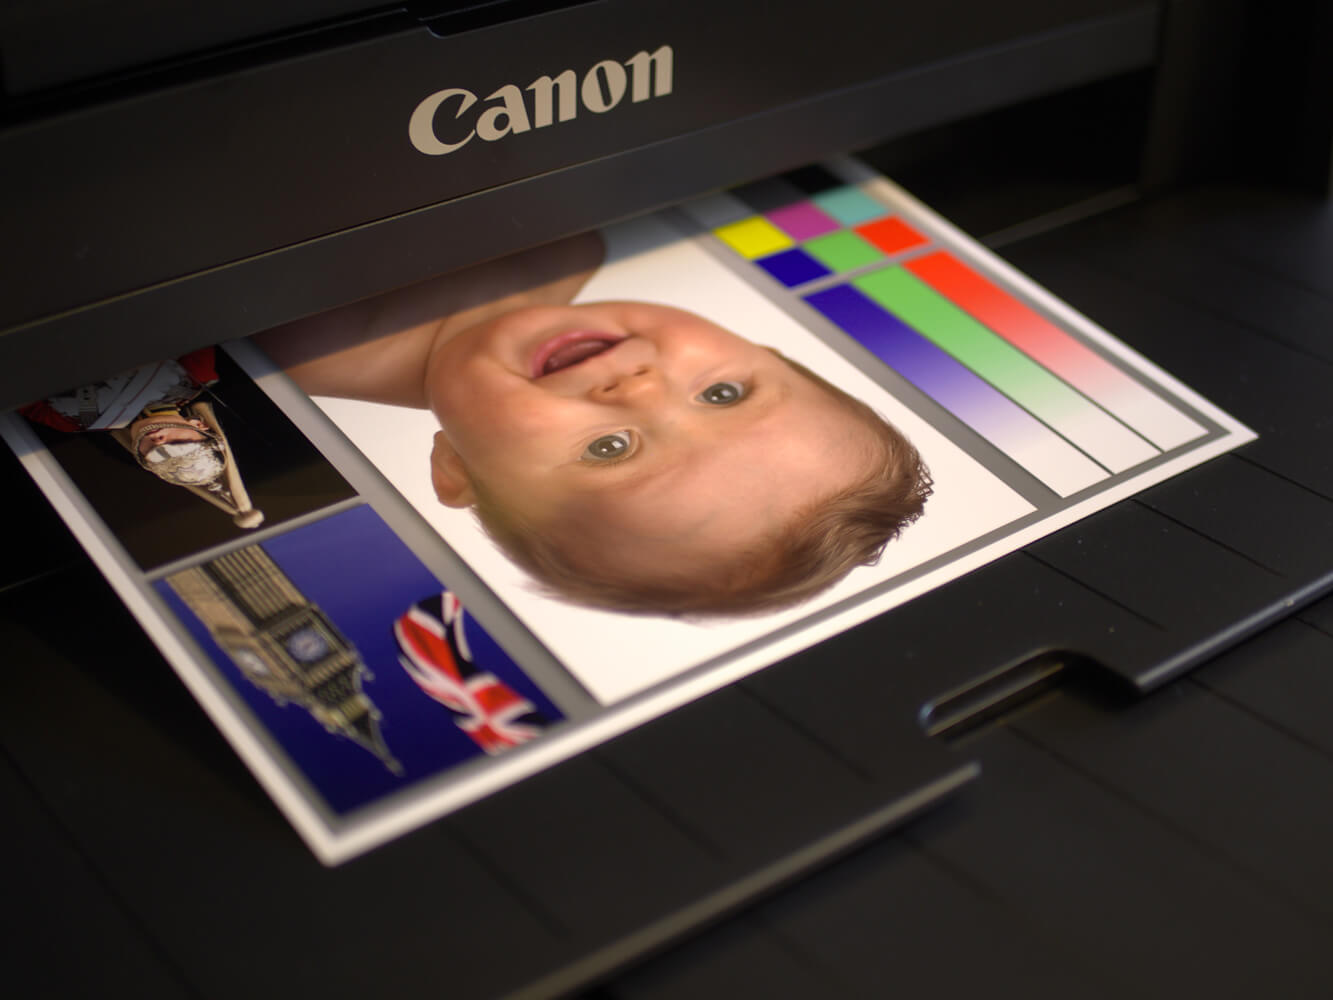
After brushing up on all of the above, performing nozzle checks, aligning print heads, printing test files, getting all my little ducks in a row, now comes the best part – seeing the printer performing as intended.
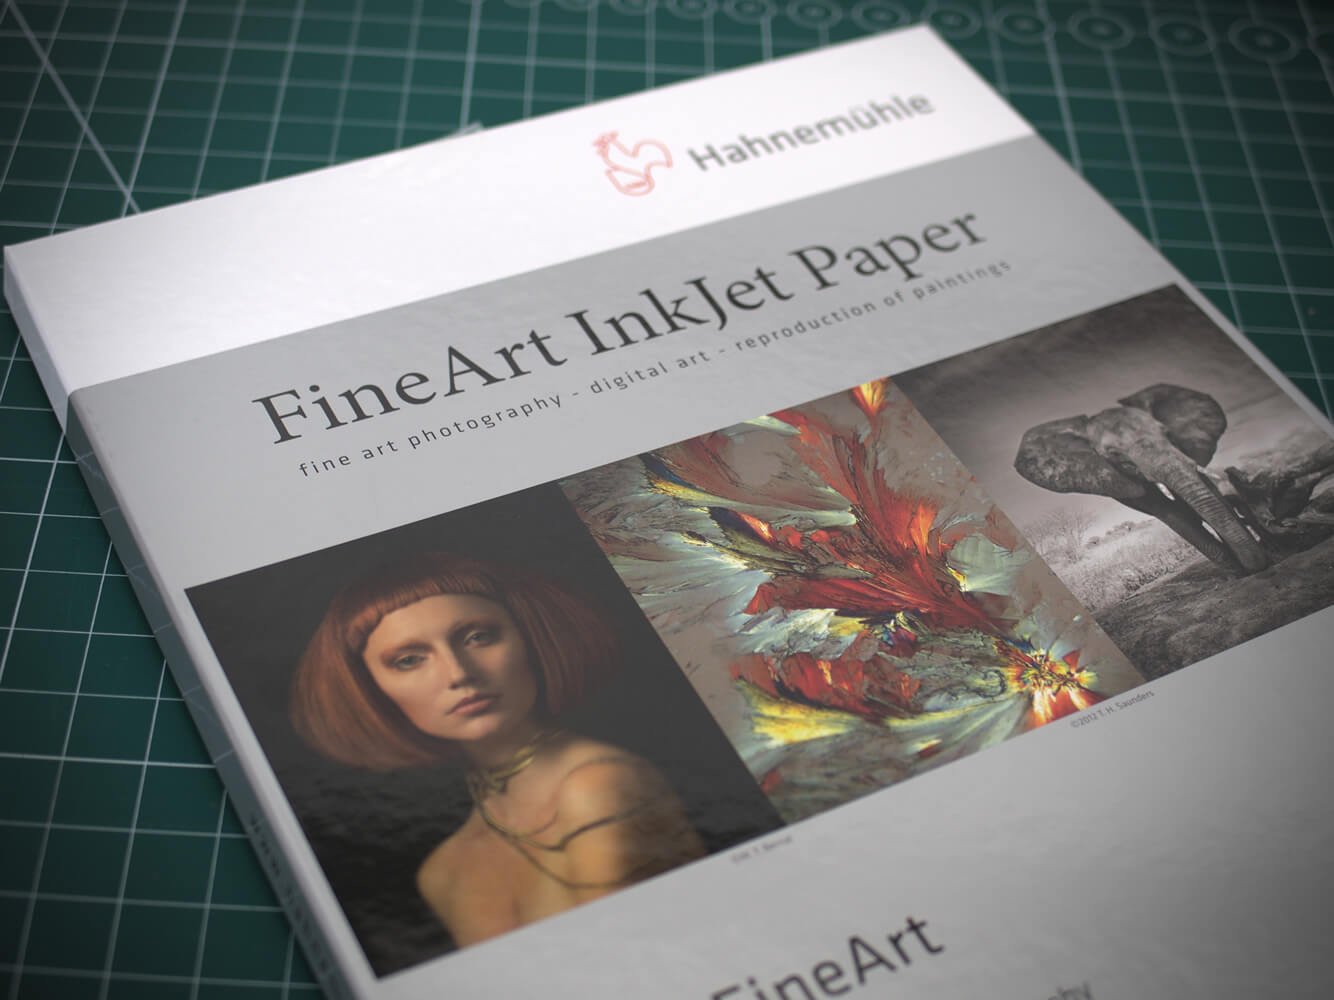
I sourced the same paper as I’ve been using via 3rd party printers for years (Hahnemühle German Etching paper, 310gsm). This is fully archival fine art quality matte paper, with a beautiful texture to it. I’ve considered other papers, but once I discovered this one I saw no need to change it. It looks and feels like perfection to me.*
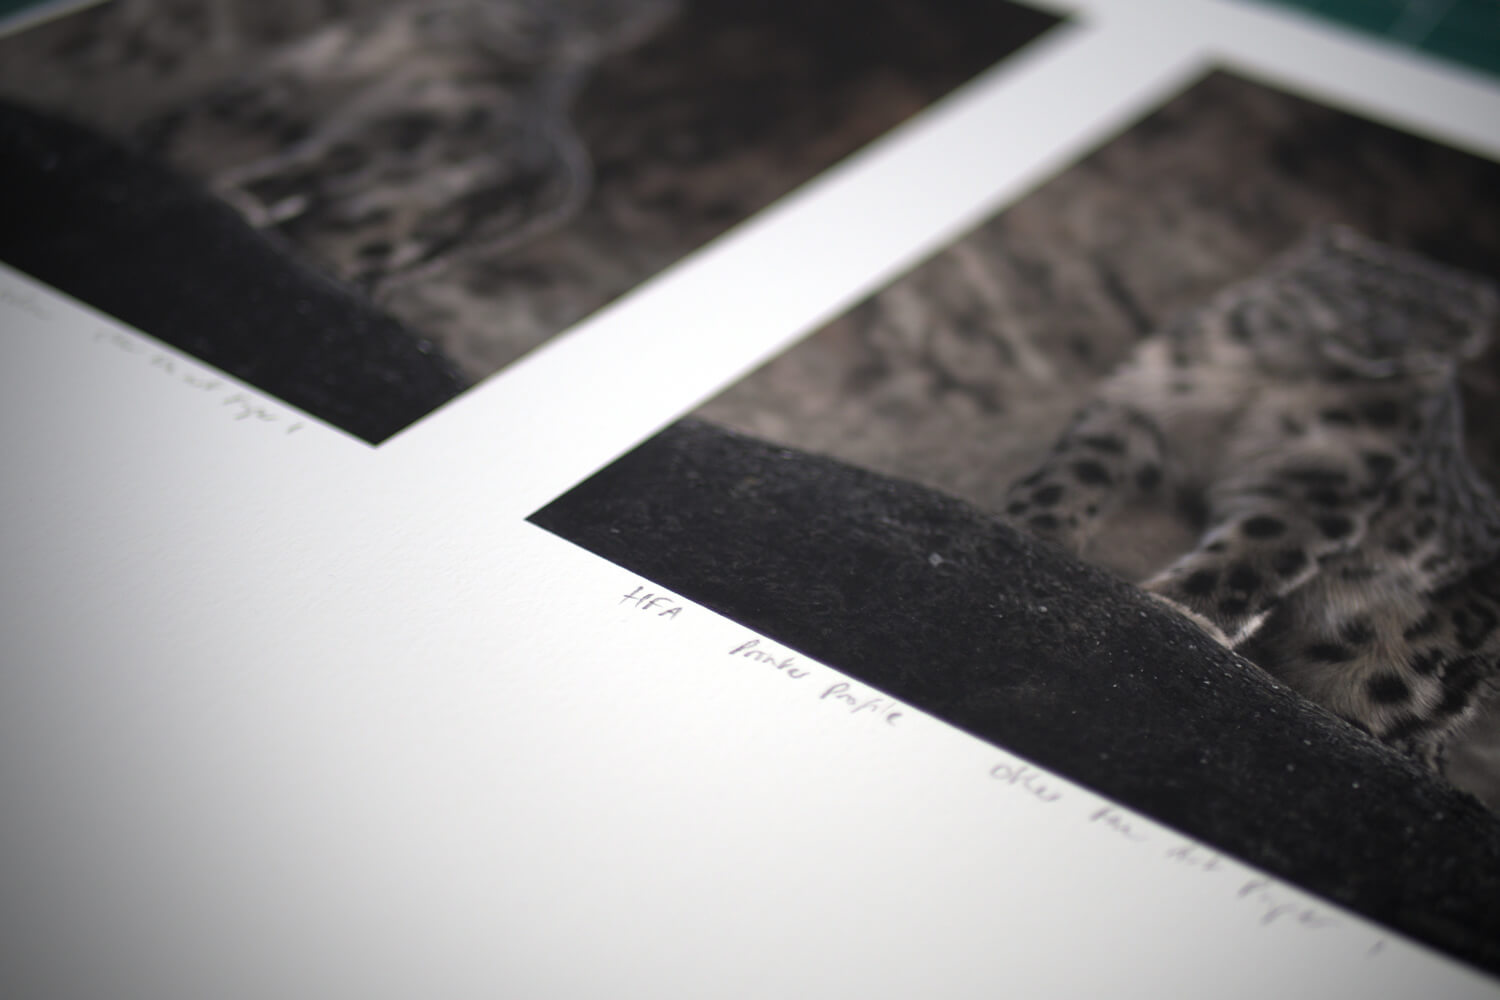
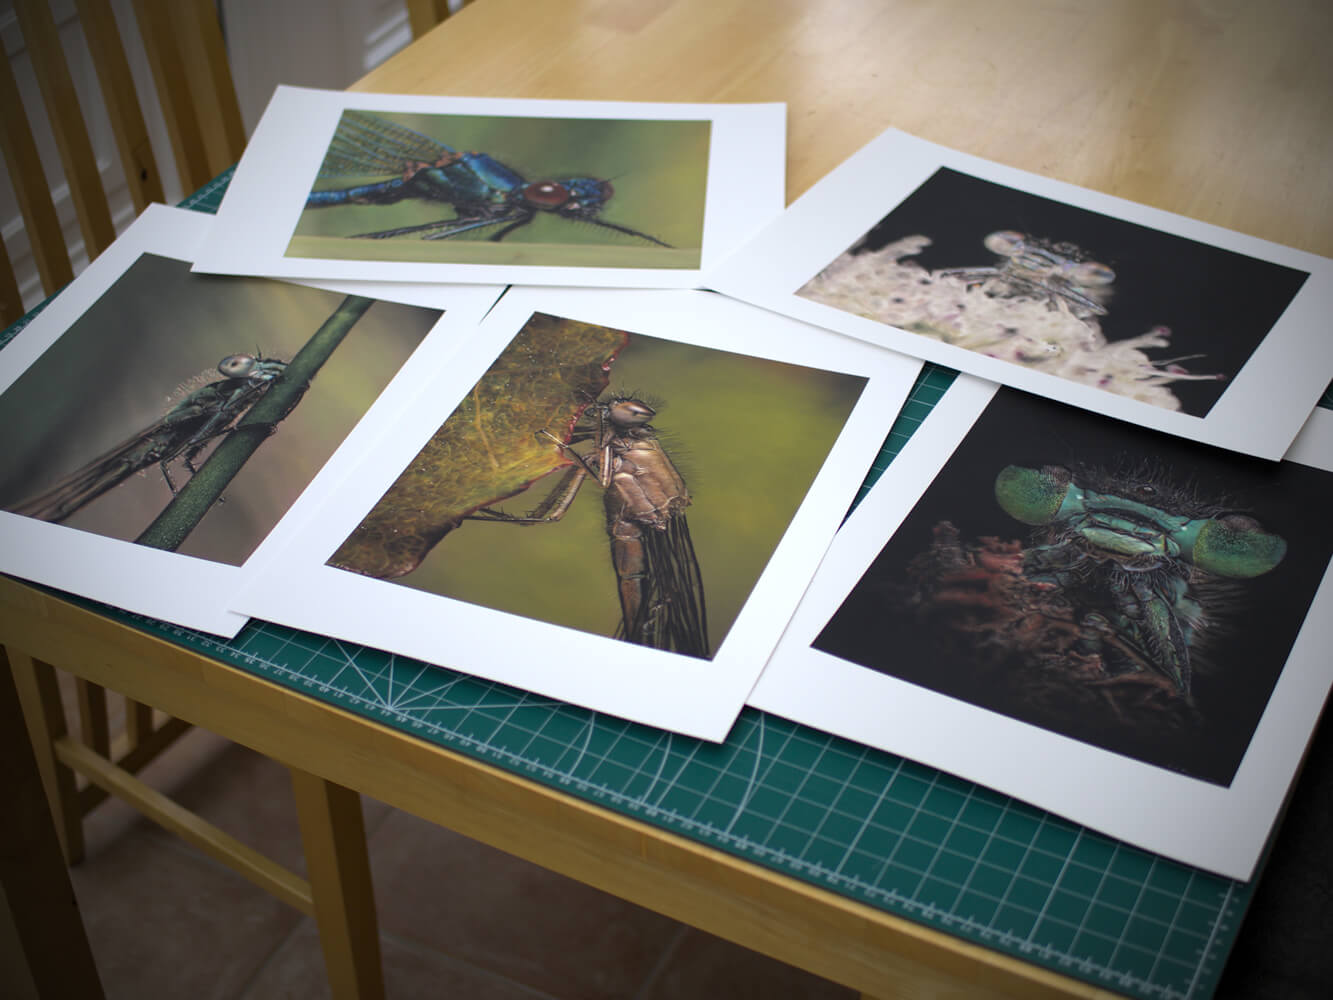
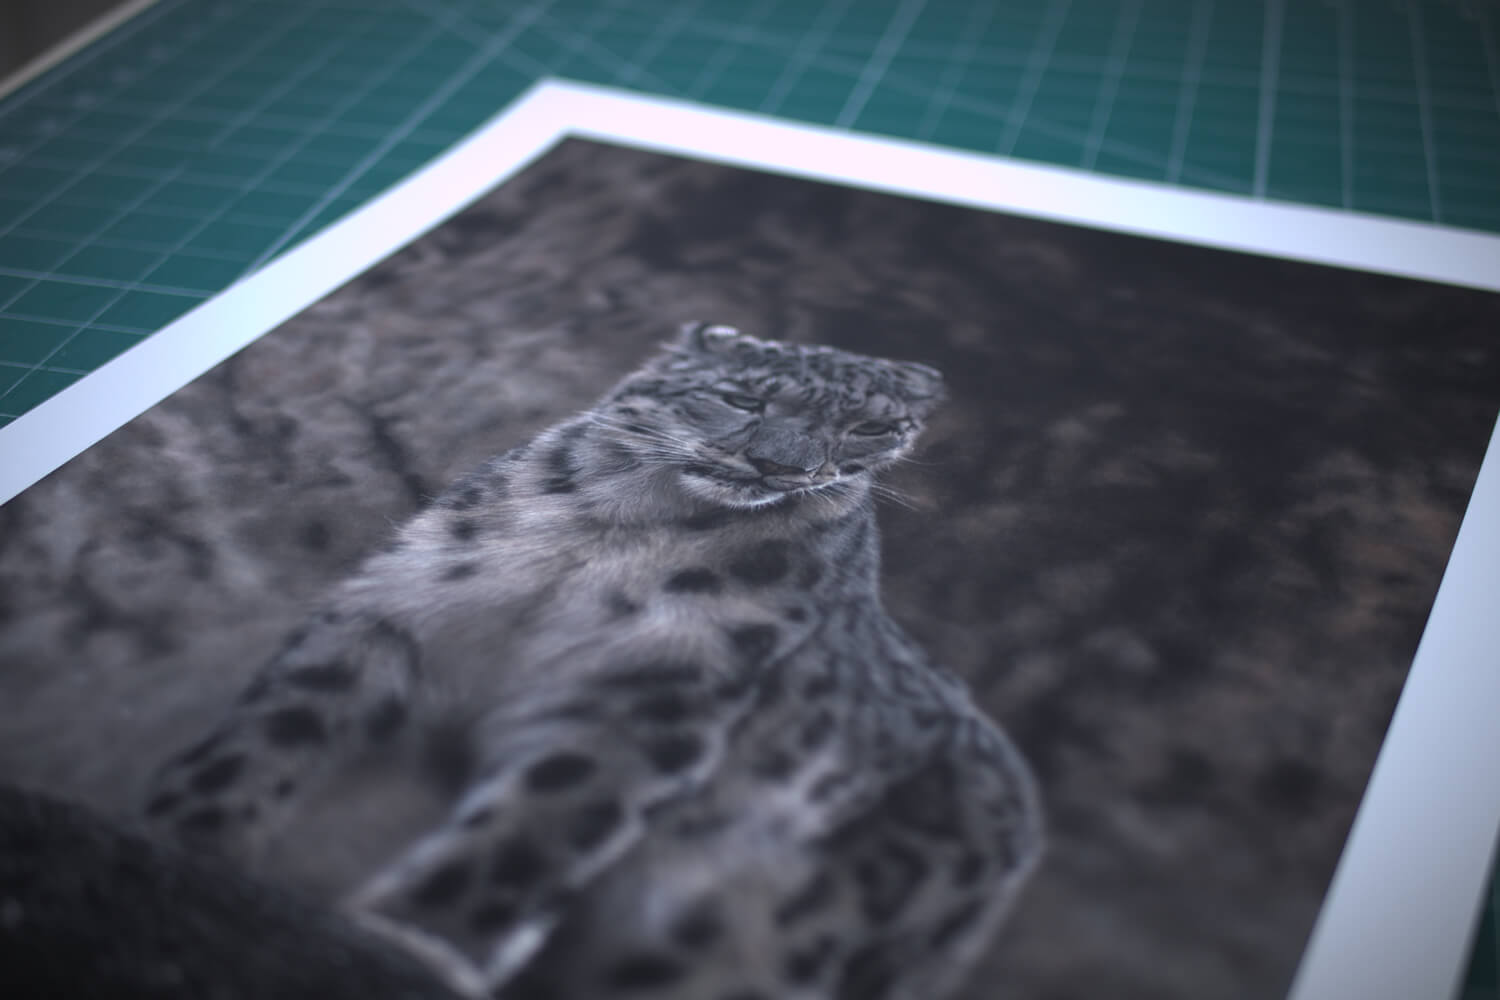
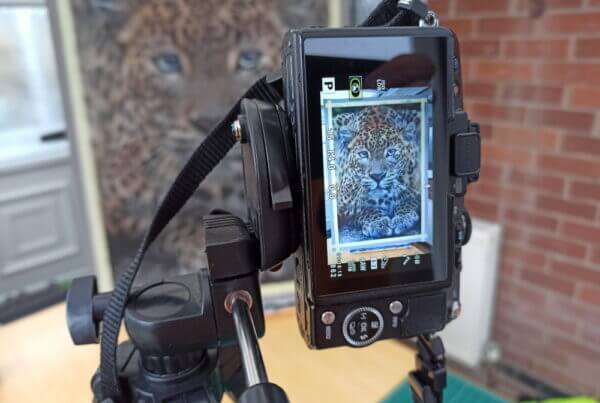
7. The results
After the investment of time and money, and a big leap of faith, wondering whether there were any stones I’d left unturned, I was thrilled. Here are a few sample images:
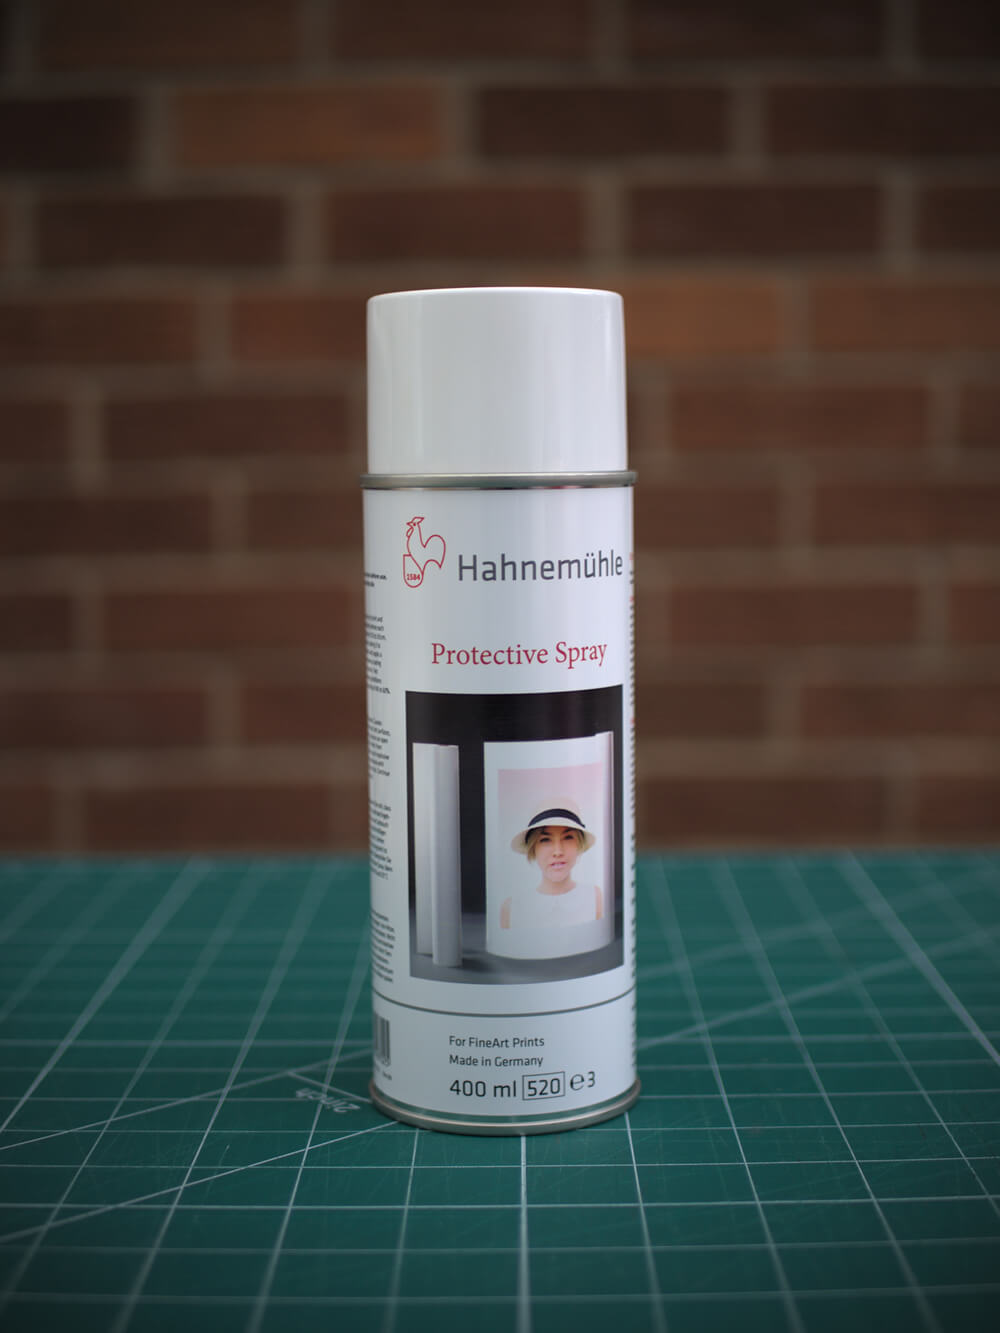
8. Protective spray
For pigment-based inks which are already designed to stand the test of time, is this dedicated Hahnemühle spray coating a dose of overkill?
Possibly. But it’s a drop in the ocean to ensure the print remains lightfast, and even better protected against potentially suboptimal environmental conditions over time.
What this means for my customers
Perhaps printing in-house has created more work for me, but it’s far from humdrum, however much of a honeymoon phase this is.
I’m proud to undertake such tasks by myself, and will confidently sign off on everything that heads out of my front door, having:
• controlled the output entirely,
• inspected and proofed all items at source,
• offered various sizes,
• produced to order, and
• delivered to buyers in record time.
If those positive upshots for the recipient weren’t obvious enough, here’s one more:
They’re more affordable prints, made with just as much regard for quality and longevity as ever. I simply pass the savings in avoiding third party printers on to the buyer.
So, if you’re looking for the perfect gift for a wildlife lover this Christmas and beyond, head to my Animals II and Damselfly series, with limited discounts available on both.
If that wasn’t enough, I’m enclosing a GOLDEN TICKET at random in one print tube for every two-week period of sales until Christmas, which will entitle the three lucky recipients to a whopping 30% off a commissioned piece for 2021.
Thanks very much for reading. I hope, whatever the reason for your visit, you found this both informative and reassuring.
[Your local, professional framer will apply the highest quality, custom, conservation-level finish and framing. Although ready-made frames available online can vary in quality, the following measurements are recommended for those wishing to choose this option:“A3+” (19″ x 13″) paper sizes:
16.64″ x 11.09″ image – 24″ x 18″ frame/mount/matte, 18″ x 12″ central cutout for matte.
16″ x 12″ image – 20″ x 16″ frame/mount/matte, 16.5″ x 12.5″ central cutout for matte.
“A3″ (16.5 x 11.7″) paper sizes:
12″ x 8″ image – A3 frame/mount/matte, 12.5″ x 8.5″ central cutout for matte.
12″ x 9″ image – A3 frame/mount/matte, 12.5″ x 9.5″ central cutout for matte.
30cm x 24cm image – A3 frame/mount/matte, 12.31″ x 9..95” central cutout for matte.
“Mushroom” (22cm x 22cm) paper size:
15cm x 15cm image – 25cm x 25cm frame/mount/matte, 16.5cm x 16.5cm central cutout for matte.
The suggested “island” matte dimensions allow a small reveal on all sides (i.e. a “floating” print), to show print information at the bottom, while maintaining symmetry. For uniform matte widths on “A3” paper sizes, custom frame sizes should be considered.]

One Comment